

One of the best features of Photoshop is the Layer Styles. We can create all sorts of effects – plastic, glass, water, ice, metal, and many more. In this tutorial, I will show you how to create a gold text effect. I will use only Layer Styles, and once our new style is created, we will be able to save the style and apply it wherever we want.
Step 1
Create a new document, apply a Layer Style on the background layer. Add a Gradient Overlay from black to a dark brown (#443501).
Create a new document, apply a Layer Style on the background layer. Add a Gradient Overlay from black to a dark brown (#443501).

Step 2
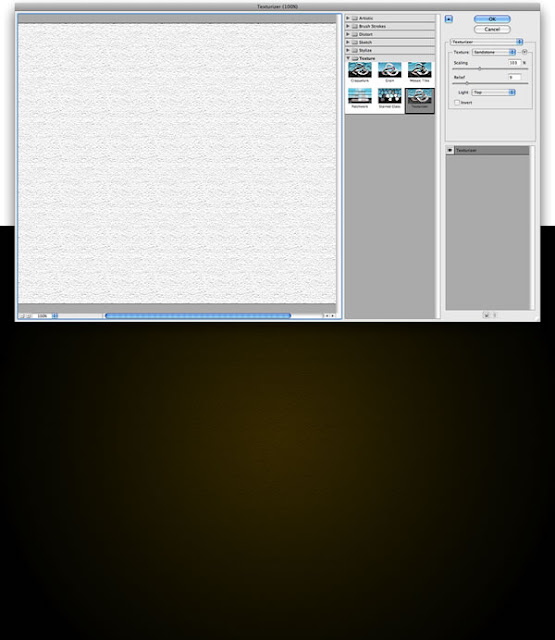
Create a new Layer and apply Filter>Texture>Texturizer. Make sure that the foreground color is white and the background is black. After that, change the Blend Mode to Multiply.
Create a new Layer and apply Filter>Texture>Texturizer. Make sure that the foreground color is white and the background is black. After that, change the Blend Mode to Multiply.
Step 3
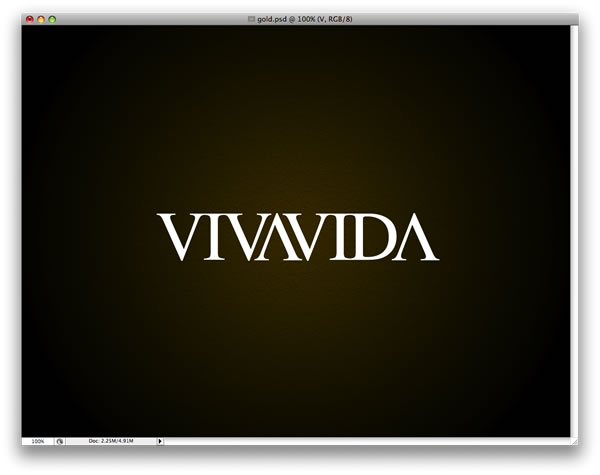
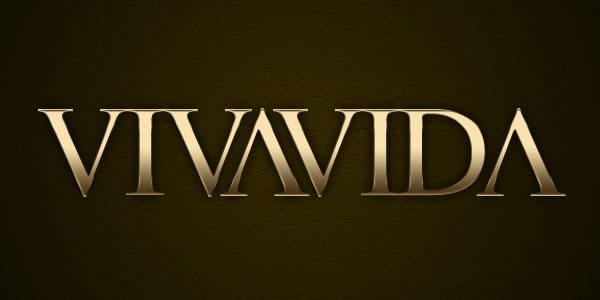
Add some text. I used Times New Roman, and for the “A” I used the “V” letter and flipped it vertically and horizontally.
Add some text. I used Times New Roman, and for the “A” I used the “V” letter and flipped it vertically and horizontally.
Step 4
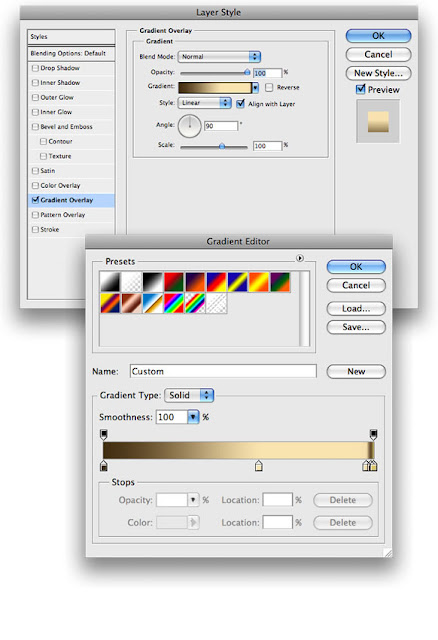
Now we start creating our gold layer style. We’ll set up the Gradient Overlay first, as shown below.
Now we start creating our gold layer style. We’ll set up the Gradient Overlay first, as shown below.
Step 5
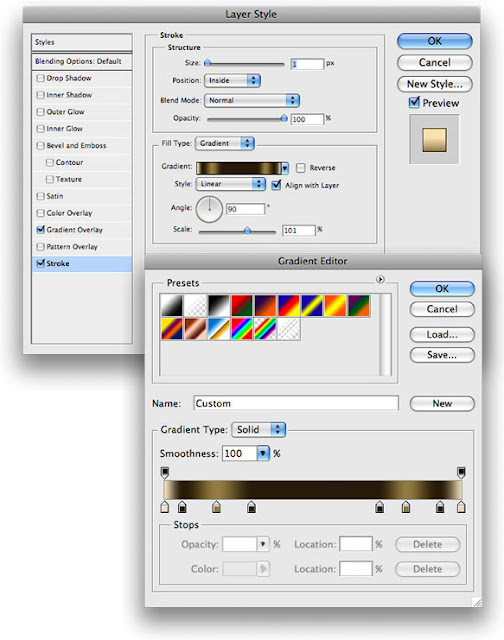
Now we’ll add a Stroke. For the Fill Type use Gradient. The position of the gradient will vary for different typefaces, so experiment and see what looks good.
Now we’ll add a Stroke. For the Fill Type use Gradient. The position of the gradient will vary for different typefaces, so experiment and see what looks good.
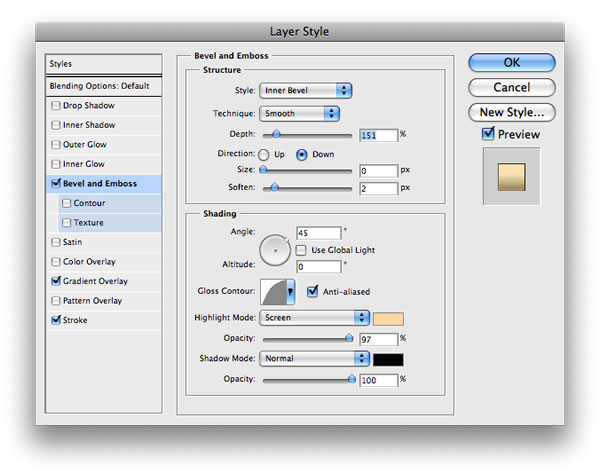
Step 6
Add Bevel and Emboss, as shown below.
Add Bevel and Emboss, as shown below.
Step 7
Finally, add some Shadow, again following the specs below.
Finally, add some Shadow, again following the specs below.
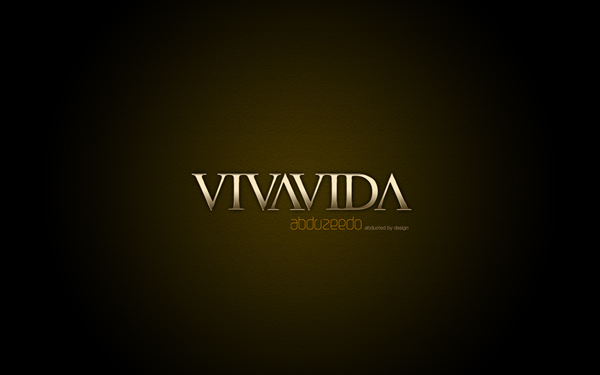
Conclusion
This a very nice example of how powerful Layer Styles are in Photoshop. Sometimes just changing some values can create a totally different effect. For this tutorial I created gold, but if you change the gradient color to variations of grey you will have silver instead of gold.
This a very nice example of how powerful Layer Styles are in Photoshop. Sometimes just changing some values can create a totally different effect. For this tutorial I created gold, but if you change the gradient color to variations of grey you will have silver instead of gold.


0 Comments